If you have your amazing custom patches with iron-on backing and want to attach them to your T-shirts, hats, jackets, or other items but have some reservations about applying them, there is no need to worry.
This blog is all about guiding you through the process of applying iron-on patches to represent your motto and uplift your style without damaging the item you are using.
First thing first, on what items can you Iron on Patches
If you want to know what items you can apply iron-on patches, then there are two aspects to it: one is applying it to clothing, and the second is applying it to accessories. If you are applying iron-on patches to clothing items, there are multiple fabric options to which you can apply them.
These options include cotton, polyester, denim, linen, and cotton polyester blends. However, we suggest avoiding applying iron on patches to delicate fabrics, including silk, rayon, and lace.
Also, wrinkle-free fabrics are a big no, especially leather or vinyl material fabric, as these materials cannot withstand the high heat of the iron.
Now, coming to the second aspect, which is applying iron-on patches to accessories. You can use iron-on patches for multiple accessories, including backpacks, tote bags, caps, beanies, denim or cotton jackets, sneakers or slip-ons, cotton scarves, and pillows made from cotton and linen.
Now you know what items are ideal for applying iron-on patches. Still, you must check the manufacturer's guidelines for the perfect iron temperature.
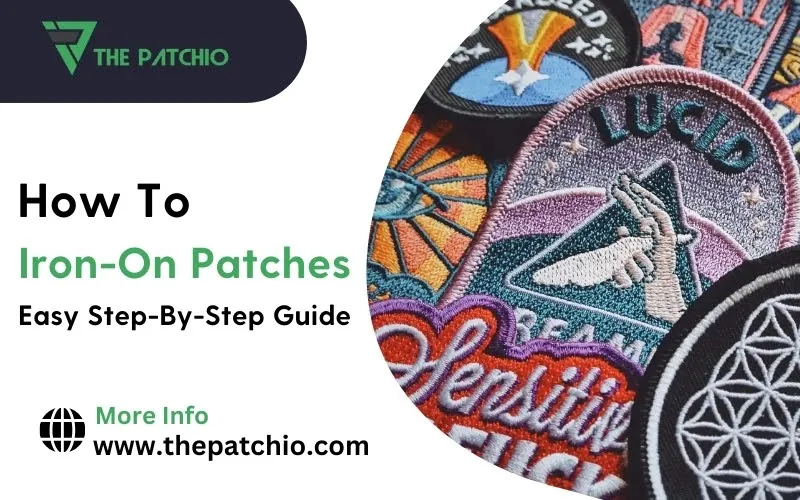
How to Apply Iron-On Custom Patches: A Quick Overview
Iron-on patches are a convenient way to personalize your clothing and accessories. Applying iron-on patches is quick and straightforward, whether you're looking to add flair to your wardrobe or brand your business gear.
These patches come with a heat-activated adhesive backing, which allows them to bond seamlessly to fabric using an iron. All you need to do is preheat your iron to a cotton setting, take your patch, press it with a thin cloth on your preferred item, apply the iron to it, and place it for at least 30 seconds, then remove it and let that area cool for 5 minutes.
Need Custom Embroidered Patches?
Reach out to customer service at ThePatchio for information or request a free quote today.
Step-by-Step Guide to Iron On Patches
Step 1: Choose the Right Fabric
Not all fabrics are suitable for iron-on patches. As mentioned in the blog, cotton, denim, canvas, and linen work best as they can withstand high heat without damage. Avoid delicate fabrics like silk, nylon, or synthetic blends, which can melt or become discolored under high temperatures.
Step 2: Preheat Your Iron
Preheat your iron to 370 degrees Fahrenheit. Turn off the steam function, as steam can interfere with the adhesive.
Step 3: Position the Patch
Lay the fabric on a flat, heat-resistant surface, like an ironing board. Position the patch exactly where you want it, with the adhesive side down. Please make sure it's adequately aligned before proceeding.
Step 4: Protect the Patch and Fabric
Place a thin towel or piece of Teflon sheet over the patch to protect it and the fabric from direct heat. This barrier also prevents the patch material from scorching or melting.
Step 5: Iron the Patch
Now it’s time to apply iron on the patch. Press the iron firmly on the patch for at least 30 seconds, depending on the fabric thickness. Apply even pressure without moving the iron back and forth. You may need to press a bit longer for thicker fabrics like denim.
Step 6: Flip the Fabric and Iron Again
Turn the fabric inside out or flip it over so that the reverse side of the patch is accessible. Iron this side for another 15-20 seconds to reinforce the bond.
Step 7: Let it Cool
Allow the patch to cool for a few minutes before touching it. This cooling period helps the adhesive set, ensuring the patch is securely in place.
Step 8: Check for Adhesion
Once cool, check the patch's edges to ensure it is fully adhered to the fabric. If any corners are loose, reapply the iron for another 10-15 seconds and let it cool.
Bonus Iron-on patch Tips for application: For better longevity, avoid washing your patched item for at least 24-48 hours after application. When you wash it, turn the item inside out and use a gentle cycle to protect the patch.
By following these steps, you can enjoy a high-quality, personalized look with your custom iron-on patches, enhancing the appearance and durability of your clothing or accessories.
Looking To Order Custom Iron-On Patches?
Contact customer service at ThePatchio for information or request a free quote today.
How to Apply Iron-on Patches Using the Heat Press Sublimation Method
Here is a step-by-step guide to making heat press sublimation t-shirts by using the heat press sublimation method.
Follow through these steps:
- Print the chosen piece of art on sublimation paper employing a sublimation printer
- With the help of a heat resistant tape, adhere patches to the sublimation paper
- Adjust the heat press to 190 degrees Centigrade for 45 seconds
- Lay down newsprint paper above the platen
- Now position the patches front side up and set newsprint paper above it
- Begin heat pressing with the machine already set on light-medium pressure
- After 45 seconds, pull out the sublimation paper
- Beware as its sizzling at this point
- Voila! You have sublimated an iron-on patch
Final Words!
After reading the above, you now know how to apply iron-on patches safely and securely. The process is straightforward; all you need to consider is the correct temperature setting and material, as discussed above.
If you want quality custom patches with iron-on backing, then ThePatchio is here. We pride ourselves on being one of the most trusted patch makers in the U.S. Get in touch today and uplift your style and brands with our quality patches.